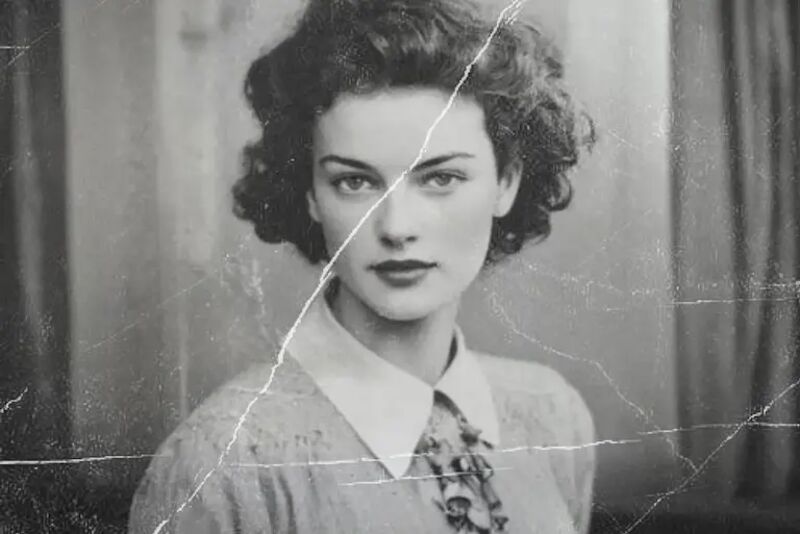
Old Photo Restoration AI that keeps the face you remember.
The risk with restoring an old photo is getting back someone who isn't quite the person you remember. Restore repairs the damage and leaves the face alone.
First result free, full resolution·No account needed
BeforeAfter
Quick verification to keep processing fast for everyone.
Best for
One pass for a print that has aged in several ways at once.
One pass covering fading, creases, scratches, and color drift together. If the print is otherwise fine and only the surface is marked, Scratch Repair does less and is the safer choice.
Family photographs that have faded in an album
Scanned prints with creases, tears, or water damage
Archive images being prepared for printing or sharing
Cost and commitment
Your first result is free, full resolution, no account needed.
5 signup credits after account creation.
Uploads are processed for your result and not used for training.
1.Upload the scan or photograph
2.Choose Restore
3.Compare the repair against the original at full size
Old photographs do not degrade in one way, which is why patching them one problem at a time rarely works. A color print from the 1970s fades because its dye layers break down at different rates, and the cyan usually goes first. That is why those prints drift orange or magenta rather than going evenly pale. A black-and-white print from decades earlier is more chemically stable, but its silver can oxidize at the edges into a bluish metallic sheen.
Then there is handling. Album pages made with acidic board leave brown staining. Photographs kept folded crack along the fold, and the emulsion lifts away in a thin line that no amount of contrast adjustment will fill. Water leaves tide lines and can bond a print to the glass it was framed behind.
Restore treats these together because they arrive together. A single scan will often carry color drift, surface scratches, a crease, and a stain at once, and correcting only one of them leaves the photograph looking half-finished.
Scanning a print so there is something to work with
The scan sets the ceiling. Nothing downstream recovers detail the scan did not capture, so this is the step worth slowing down for.
Scan at 600 dpi for a standard print, and higher if the original is small. A wallet-sized photograph at 300 dpi gives very little to work from, while the same print at 1200 dpi holds grain structure that helps the model tell damage apart from detail. Save as PNG or a high-quality JPG. Clean the scanner glass first, because dust on the platen becomes damage in the file and gets treated as something to repair.
Turn off the scanner software's own restoration settings. Automatic dust removal, color correction, and backlight compensation all make irreversible decisions before you see the file, and they tend to soften exactly the fine detail that matters. A flat, slightly dull scan is a better starting point than one the driver has already tried to fix.
A phone photograph of a print can work if the print is flat and the light is even. Shoot in indirect daylight rather than under a lamp, avoid a flash, and keep the camera parallel to the print.
What restoration can and cannot bring back
Restoration is inference. Where the photograph still holds a faint record of something, the model has a basis for reconstructing it. Where the emulsion has lifted away completely, there is no record left, and anything that appears in that gap is invention.
This matters most on faces. A face reconstructed from too little information comes back plausible and wrong, which is worse than a face that is visibly damaged. Restore is weighted towards leaving facial structure alone, and the practical consequence is that a badly damaged face may stay somewhat damaged. That is the intended behavior.
Compare the result against the original at full size before you download it, and pay attention to eyes, mouths, and hands. On a photograph that matters to you, that check is worth the minute it takes.
When a lighter pass is the better call
Restore changes a lot of the image, and that is not always what you want. If the print is in good condition and the only problem is surface dust or a few fine scratches, Scratch Repair targets the damage and leaves the rest untouched.
If the photograph is structurally fine but grainy after scanning, Denoise is the narrower fix. If it is clean but too small for printing, Upscale is the one you want. Running Restore on a photograph that only needs one of those is spending more change than the problem calls for.
The tools also stack. A common order for a damaged album scan is Restore first for the fading and the creases, then Denoise if scanner grain is still visible, then Upscale last if the result is headed for a print larger than the original. Doing it in that order means each pass works on a cleaner image than the one before, and the enlargement happens after the damage is gone rather than magnifying it.
What comes back
You get a PNG at the resolution you uploaded, with no watermark, on the free result as well as on paid ones. Nothing is cropped and no border is added.
Uploads are processed to produce your result and are not used for training. If you want the file kept alongside your other work, create an account and it stays in the workspace history; otherwise download it and it is done.
FAQ
Common questions
How many credits does restore use?
Restore uses 3 credits per image.
Will it change how people look?
It is tuned to repair damage rather than redraw faces. Compare at full size before you download — on a photo that matters, that check is worth the minute.
Is this right for family archives and scanned prints?
That is exactly what it is for. For surface marks alone, Scratch Repair is lighter. If grain remains afterwards, follow with Denoise.
How should I scan a print before uploading?
Scan at the highest resolution your scanner offers and save as PNG or high-quality JPG. The more the model gets, the more it has to work with.
Should I turn off my scanner's automatic corrections?
Yes. Automatic dust removal and color correction make decisions before you see the file, and they usually soften the fine detail that restoration depends on.
Can I photograph a print with my phone instead of scanning it?
It works if the print is flat and the light is even. Use indirect daylight, skip the flash, and hold the camera parallel to the print so the edges stay square.
What happens to a face that is badly damaged?
It may stay somewhat damaged. Where the emulsion is gone there is nothing left to reconstruct from, and inventing a face is a worse outcome than leaving the damage visible.
Does the free result carry a watermark?
No. The first result is full resolution with no watermark and no account.
Are my uploads used for training?
No. Uploads are processed to produce your result and are not used for training.