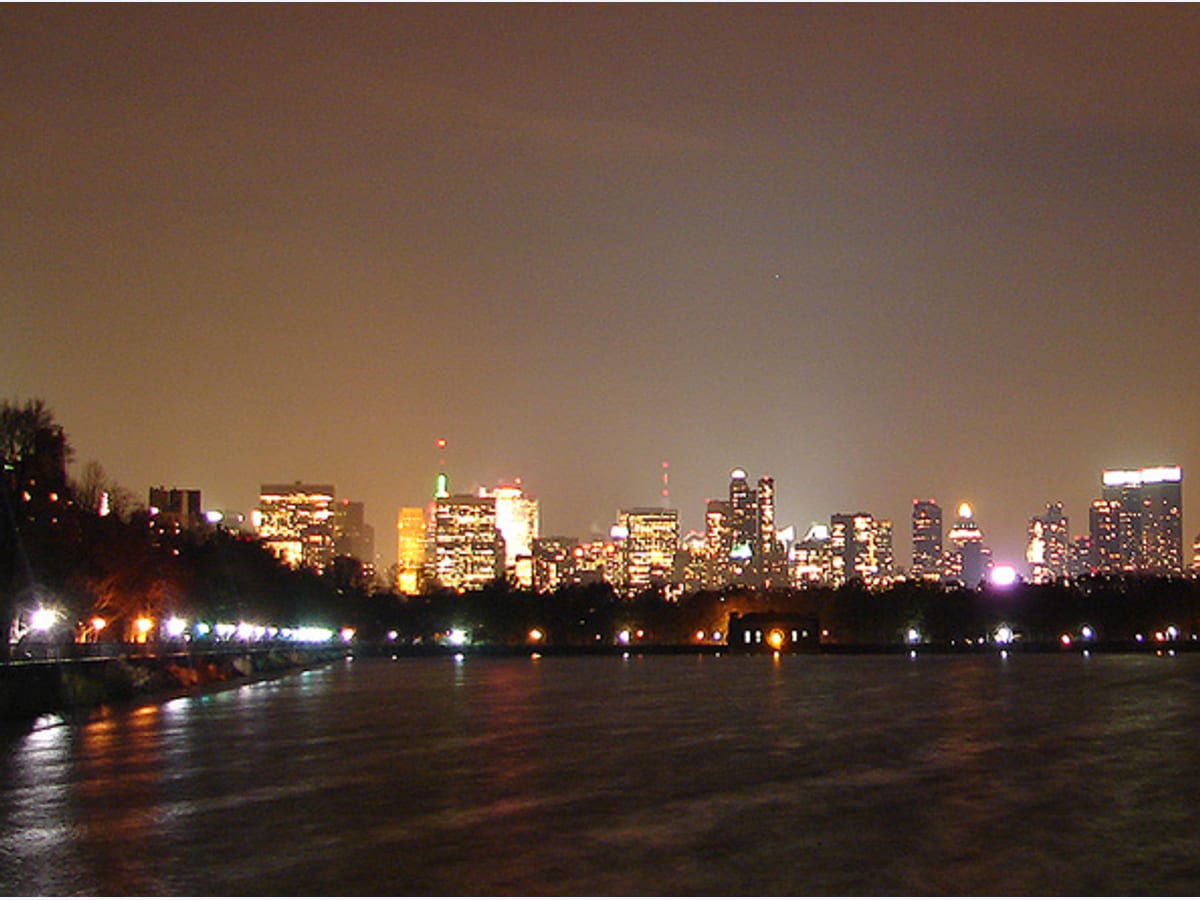
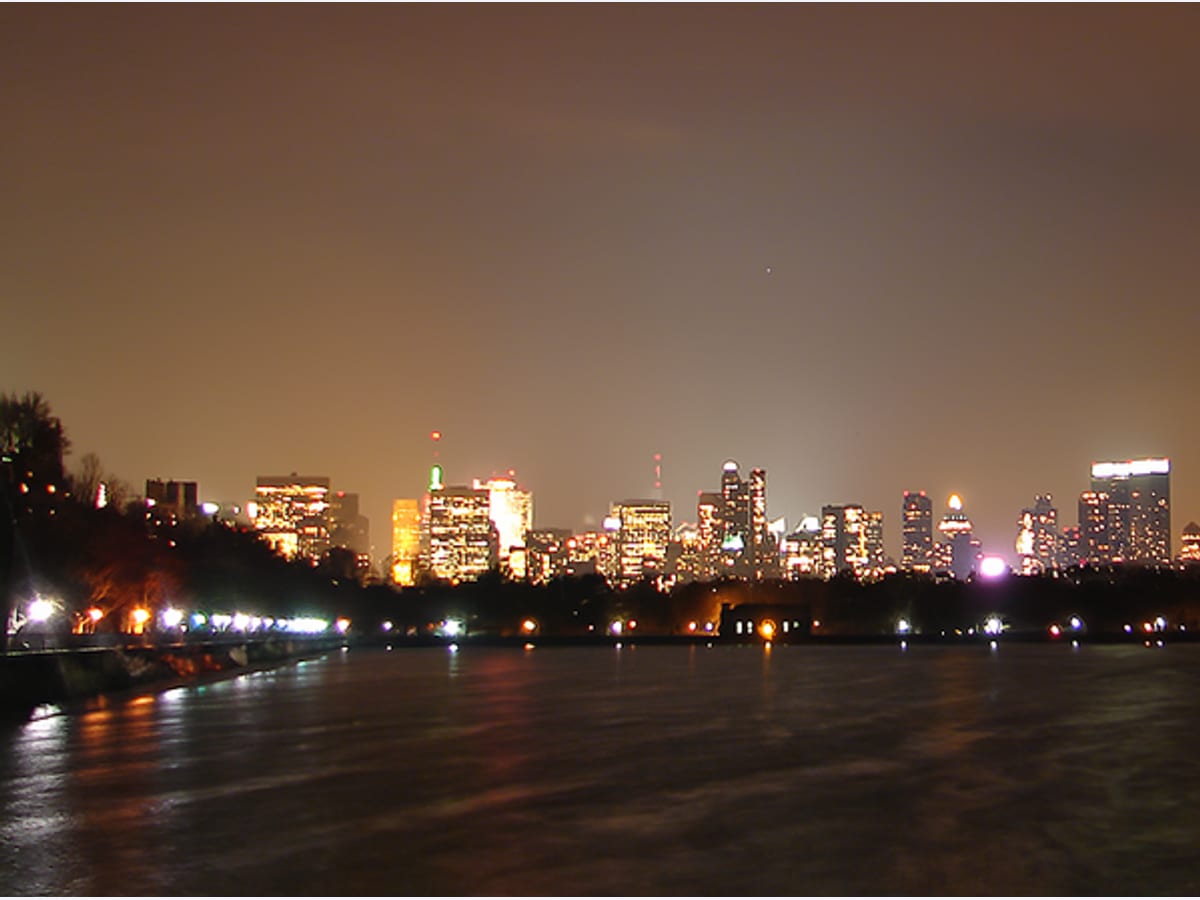
AI Photo Denoise that clears the grain and leaves the edges alone.
Most denoisers buy a clean image by softening everything in it. This one is tuned to drop grain and leave edges where they are, so faces still look like faces.
First result free, full resolution·No account needed
BeforeAfterSource photo: Diego Torres Silvestre, CC BY 2.0
Quick verification to keep processing fast for everyone.
Best for
For grain from low light, and blocks from compression.
Use Denoise on anything shot in low light, or on an image that has been compressed and re-compressed until it went blotchy. It pairs well with Upscale when the file is small too.
Night and indoor photos with visible grain
Phone portraits shot in a dim room
Images that picked up blockiness from messaging apps or repeated exports
Cost and commitment
Your first result is free, full resolution, no account needed.
5 signup credits after account creation.
Uploads are processed for your result and not used for training.
Sensor noise and compression artifacts arrive from opposite directions, and telling them apart changes what you should do about the file.
Sensor noise is random. In low light the camera amplifies a weak signal, and the amplification brings up the sensor's own electrical variation along with the picture. It shows as fine speckle, usually worse in shadows and in the color channels, and it is worst on small sensors pushed to high ISO. Phone photographs taken indoors at night are the common case.
Compression artifacts are structured. A JPG encoder divides the image into blocks and discards the detail within each block that it judges least visible. Push the quality low enough, or re-save the same file often enough, and the block edges become visible as flat squares, with colored fringing around high-contrast edges. Messaging apps and social platforms re-encode on upload, so an image that has been shared a few times carries several generations of this.
Denoise handles both, and on a photograph that has been shot in low light and then shared through an app, both are usually present at once.
The trade every denoiser makes
Removing noise means deciding which small variations in the image are signal and which are not. Get that decision wrong in one direction and grain survives. Get it wrong in the other and real detail goes with the noise.
Most denoisers resolve this by leaning towards smoothing, because a smooth image reads as clean at a glance and the loss only shows when you look closely. The cost lands on the things made of fine variation: eyelashes, hair, fabric weave, the texture of skin. A heavily denoised portrait has the characteristic look of a face rendered in wax.
This one is weighted towards keeping edges and facial detail, which means some grain may survive in flat areas like a sky or a wall. That is a deliberate choice, and it is the one worth making on a photograph of a person.
What to check in the result
Look at three places before you download. First, faces at full size: eyes and the edge of the hairline are where over-smoothing shows first. Second, flat areas of even color, where blotchy patches appear if the model has grouped noise into shapes rather than removing it. Third, any fine repeating pattern such as a knitted texture or a screen, which is where detail loss is easiest to see because you know what the pattern should look like.
If the result reads a little flat afterwards, that is normal. Noise adds apparent bite, and removing it takes some of that with it. Following with Sharpen restores the impression of clarity without bringing the grain back.
Shooting so there is less to remove
Cleanup is always a recovery from something, and the cheapest noise to deal with is the noise that never got into the file. If you have any control over the capture, a few things move the result more than any later pass.
Hold the exposure longer rather than raising the sensitivity. A phone braced against a table or a wall for a fraction of a second collects more real light, and more light is the only thing that genuinely improves the ratio between signal and noise. Raising ISO amplifies both together, so it brightens the picture without making it any cleaner.
Shoot in the largest format your camera offers, and avoid apps that export a reduced copy. Turn on RAW if the phone supports it, since the JPG the camera writes has already applied its own noise reduction and sharpening, and both of those are irreversible by the time you see the file.
None of this helps with a photograph already taken, which is the usual situation. It matters for the next one.
Order of operations
Denoise early. Grain is structure, so any process that reconstructs or enlarges structure will treat it as detail worth keeping. Running Upscale on a noisy file produces a larger file with larger grain, and no later cleanup pass recovers what the enlargement locked in.
The reliable order for a noisy, small image is denoise, then enlarge, then sharpen if it still needs bite. On a scanned print, put Restore or Scratch Repair before all of it, since scanner grain and physical damage are separate problems and the damage repair works better on an untouched scan.
What the source file should be
JPG, PNG, and WEBP all work, and the result comes back as a PNG so the cleaned image is not immediately re-compressed into new artifacts.
Use the least-shared copy you can find. Every time a file passes through a platform it is re-encoded, and each generation adds artifacts on top of the ones already there. Recovering the original from the camera roll rather than the version forwarded through a chat is usually a larger improvement than anything the model can do afterwards.
FAQ
Common questions
How many credits does denoise use?
Denoise uses 1 credit per image.
Will it blur the detail I want to keep?
It is tuned against that. If the result reads a little flat afterwards, follow with Sharpen.
Does it help with compressed social exports?
Yes. It handles the blockiness that platforms add on top of the original grain, which is usually the more visible problem.
What is the difference between sensor noise and compression artifacts?
Sensor noise is random speckle from amplifying a weak signal in low light. Compression artifacts are structured blocks and color fringing left by an encoder. Both are handled here.
Should I denoise before or after upscaling?
Before. Upscale treats grain as structure worth keeping, so enlarging first gives you a bigger file with bigger grain.
Why is there still some grain in the sky?
The model is weighted towards keeping edges and facial detail rather than smoothing everything flat. Some grain in even areas is the cost of that choice.
Can it fix a photo that has been shared several times?
It helps, but each re-encode has already discarded detail. If you still have the original from the camera roll, start there instead.
What format do I get back?
A PNG, so the cleaned image is not immediately re-compressed into fresh artifacts.